Ultimate Guide: Build A Mobile E-commerce App With React Native And Medusa.js
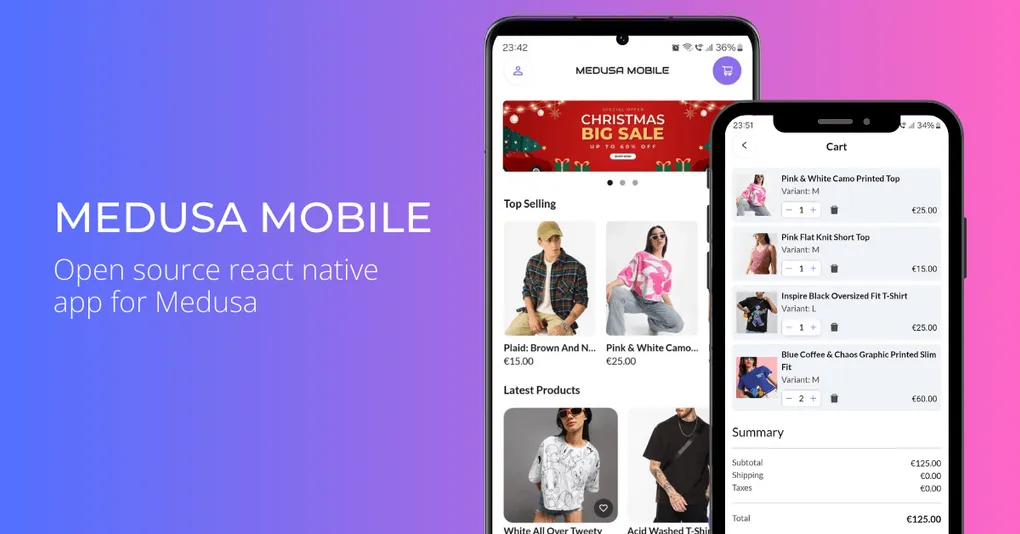
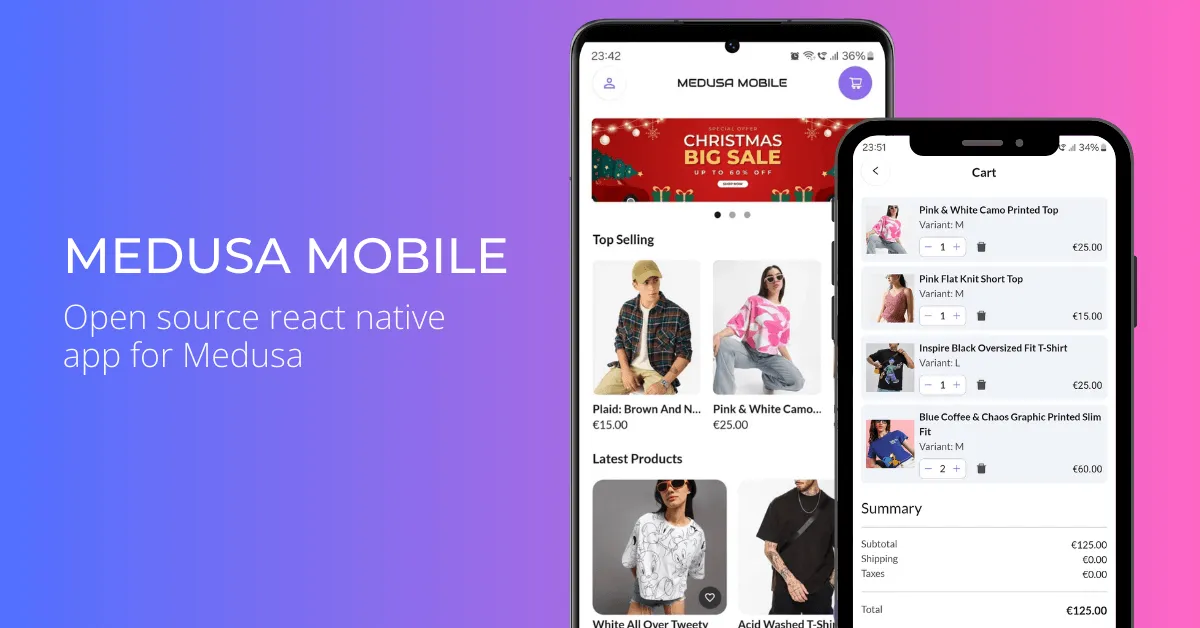
Looking to build a mobile app with Medusa.js? This guide walks you through setting up Medusa Mobile, an open-source React Native storefront for Medusa v2, and customizing its cart, customer, region, and theme features.
What is Medusa?
Medusa is an open-source headless commerce engine that enables developers to create unique and scalable e-commerce experiences. Unlike traditional e-commerce platforms, Medusa offers:
-
Headless Architecture: Complete freedom in frontend implementation
-
Extensible Core: Plugin system for custom functionality
-
Developer-First: Built with TypeScript and modern development practices
-
Multi-Region Support: Built-in multi-currency support based on region
-
Order Management: Comprehensive order lifecycle handling
-
Inventory Management: Built-in inventory and variant management
-
Modular architecture
Why React Native?
React Native is a framework for building native mobile applications using React:
-
Native Performance: Direct access to native platform capabilities
-
Code Reusability: Share logic between iOS and Android
-
Large Ecosystem: Extensive library of third-party packages
-
Hot Reload: Fast development with instant feedback
-
Strong Community: Active development and community support
Using React Native with Medusa
Combining React Native and Medusa.js creates powerful mobile e-commerce possibilities:
-
Native Mobile Experience: Build a React Native Medusa app with native UI components
-
Mobile-First Features: Leverage device capabilities like push notifications
-
Persistent State: Restore cart, region, and authentication data with AsyncStorage; commerce operations still require the backend
-
Performance Optimization: Native rendering for smooth product browsing
-
Cross-platform support: Build an Android and iOS e-commerce mobile app using a single code base
Introducing Medusa Mobile
Medusa Mobile is a React Native CLI storefront with product browsing, cart management, authentication, and checkout. The current project uses React Native 0.87.1 and React 19.2.3, and has been tested with the Medusa 2.21.2 starter backend. Use these as the documented compatibility baseline rather than assuming every Medusa v2 release has been validated.
Manual-payment checkout is implemented. Stripe’s external payment flow remains a TODO, so plan that integration and test your store’s checkout before a production release.
Features of Medusa Mobile:
-
🛍️ Product browsing with infinite scroll
-
👤 User authentication and profile management
-
🔍 Categories and collections
-
🛒 Cart management and promo codes
-
🏃♂️ Guest checkout
-
📦 Order tracking
-
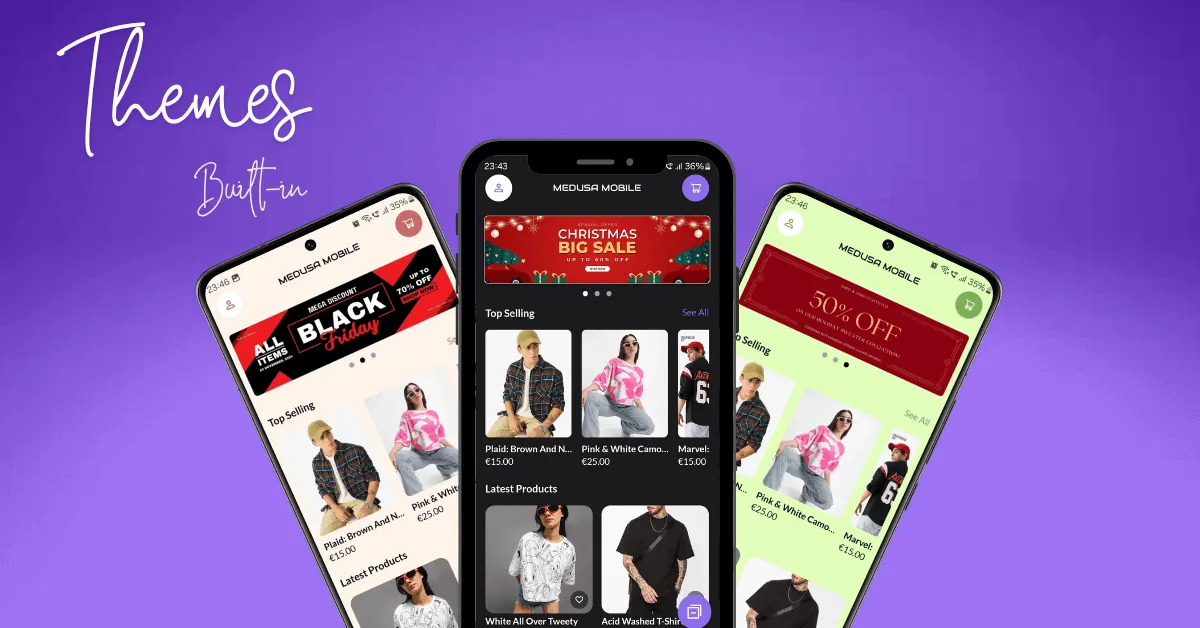
🎨 Multiple themes with dark mode
-
🌍 Multi-region support
-
🌐 Localization in English and Indonesian
Setting up Medusa Backend
The backend is a separate project. Follow the Medusa installation guide to configure PostgreSQL and create a backend. You can skip the optional web storefront because this repository supplies the mobile storefront. The mobile app does not install the backend or run its database migrations.
For a fresh demo database, use the starter’s seed workflow to populate products, inventory, regions, shipping options, and the manual payment provider. Do not reseed an existing store as a troubleshooting step. In Medusa Admin (http://localhost:9000/app), obtain a publishable API key and link it to the sales channel containing your products. Use that key in the app; admin credentials and secret keys do not belong in the mobile bundle.
The repository development guide covers starting an existing backend and configuring the connection.
Setting up Medusa Mobile
📋 Prerequisites
- Node 24, as specified in
.nvmrc. The package also supports Node 22.13+ within 22.x, 24.3+ within 24.x, or 26+. - npm 11.19.1, as recorded in
package.json#packageManager. - A React Native development environment. Android uses JDK 17 and the SDK, build tools, and NDK versions declared in
android/build.gradle. iOS requires a full Xcode installation. - A running Medusa v2 backend for using the app. Automated unit tests do not require a backend.
Step 1: Environment Setup
Clone the repository and install its locked dependencies:
git clone https://github.com/bloomsynth/medusa-mobile-react-native.git medusa-mobile
cd medusa-mobile
nvm install
nvm use
npm install --global [email protected]
npm ci
Create .env only if it does not already exist:
if [ ! -f .env ]; then cp .env.template .env; fiSet MEDUSA_BACKEND_URL and PUBLISHABLE_API_KEY. DEFAULT_LOCALE accepts en-US or id-ID; the default is en-US, and a saved locale takes precedence.
| Target | Local backend URL |
|---|---|
| Android Studio emulator | http://10.0.2.2:9000 (template default) |
| iOS simulator | http://localhost:9000 |
| Physical device | Your computer’s LAN IP, for example http://192.168.1.100:9000 |
The publishable key must be associated with the products’ sales channel. Environment values are compiled into the app, so restart Metro with a cleared cache and reload the app after changing them. Keep .env out of Git.
Step 2: Run the Project Checks
npm run verifyThis runs ESLint, TypeScript, and Jest serially with Watchman disabled. Placeholder environment values suffice because unit tests mock API calls and native modules. GitHub Actions uses the same checks on pull requests and pushes to main.
Step 3: Start Metro Server
Start the backend and your emulator or simulator, then run:
npm start -- --reset-cacheStep 4: Run the Application
For Android, open another terminal in the repository root:
adb devices
npm run android
For iOS, install the Ruby and CocoaPods dependencies before launching:
bundle install
cd ios
bundle exec pod install
cd ..
npm run ios
If Metro fails because of a broken host Watchman installation, use the temporary configuration described in the Watchman troubleshooting guide.
📱 Expo Usage
This project uses React Native CLI. Expo support requires a migration; it is not configured in this repository. See the Expo CLI migration guide if you want to adapt the native project.
📁 Project Structure
app/
├── screens/       # Screen components
├── components/    # Reusable UI components
├── data/          # Data context providers
├── styles/        # Theme and style utilities
├── utils/         # Helper functions
└── api/           # API client configuration
📖 Developer Guide
Here’s the documentation for managing the core functionality of the app. Use the shared Medusa SDK in app/api/client.tsx. Catalog and checkout option requests use React Query, while cart mutations live in app/data/cart-context.tsx and replace shared cart state with the server response. See the architecture guide for the state flow and dependency constraints.
🛒 Cart Management
The cart functionality is provided through the useCart hook, which gives you access to cart operations and state.
Basic Usage
import { useCart } from '@data/cart-context';

function MyComponent() {
  const {
    cart,                // Current cart state
    addToCart,          // Add items to cart
    updateLineItem,     // Update item quantity
    removeLineItem,     // Remove item from cart
    applyPromoCode,     // Apply discount code
    removePromoCode,    // Remove discount code
    setShippingMethod   // Set shipping option
  } = useCart();
}
Working with Cart Items
- Add a product to the cart:
const { addToCart } = useCart();

// Quantity is required when adding items
await addToCart(variantId, 1); // Add one item
await addToCart(variantId, 3); // Add three items- Update item quantity:
const { updateLineItem } = useCart();

// Update to specific quantity
await updateLineItem(lineItemId, 2);

// Remove item by setting quantity to 0
await updateLineItem(lineItemId, 0);
Managing Promotions
const { applyPromoCode, removePromoCode } = useCart();

// Apply a promotion code
const success = await applyPromoCode('SUMMER2024');

// Remove a promotion code
await removePromoCode('SUMMER2024');
Shipping Methods
const { setShippingMethod } = useCart();

// Set shipping method
await setShippingMethod(shippingMethodId);
Accessing Cart Data
const { cart } = useCart();

// Get cart items
const items = cart.items;

// Get cart totals
const {
  subtotal,
  tax_total,
  shipping_total,
  discount_total,
  total
} = cart;

// Check applied discounts
const appliedPromotions = cart.promotions;

// Get selected shipping method
const currentShipping = cart.shipping_methods?.[0];
Cart Lifecycle
The cart system handles various states and transitions:
- Cart Creation:
const { cart } = useCart();

// Cart is automatically created when needed
// You don't need to explicitly create a cart- Guest to Customer Cart Transfer:
// When a guest user logs in, their existing cart is
// automatically associated with their customer account
// This is handled by the CartProvider and CustomerProvider

import { useCustomer } from '@data/customer-context';
import { useCart } from '@data/cart-context';

function CheckoutFlow() {
  const { customer } = useCustomer();
  const { cart } = useCart();

  // Cart remains the same, only the customer_id is updated
}- Cart update on region change:
import { useRegion } from '@data/region-context';
import { useCart } from '@data/cart-context';

function MyComponent() {
  const { region } = useRegion();
  const { cart } = useCart();

  // Cart automatically updates when region changes
  // Product prices will be updated based on the region
  console.log(cart.region_id); // Current region ID
  console.log(cart.currency_code); // Region's currency
}
🌍 Region Management
The region functionality is provided through the useRegion hook, which handles region selection and persistence.
Basic Usage
import { useRegion } from '@data/region-context';

function MyComponent() {
  const {
    region,             // Current selected region
    setRegion,          // Update region state
  } = useRegion();
}
Working with Regions
- Access current region:
const { region } = useRegion();

// Get region details (if region is loaded)
const {
  id,
  name,
  currency_code,
  countries
} = region || {};- Change region:
const { setRegion } = useRegion();

// Fetch region data first
const { region: newRegion } = await apiClient.store.region.retrieve(regionId);

// Update region
setRegion(newRegion);
// This will:
// - Persist region selection
// - Update cart region automatically
// - Trigger price recalculations
Region Selection UI
The app provides a built-in region selector modal:
import { useNavigation } from '@react-navigation/native';

function MyComponent() {
  const navigation = useNavigation();

  // Open region selector modal
  const openRegionSelect = () => {
    navigation.navigate('RegionSelect');
  };
}
Working with Countries
The app provides a dedicated hook for accessing region countries:
import { useCountries } from '@data/region-context';

function AddressForm() {
  const countries = useCountries();

  // Format countries for picker/selector
  const countryOptions = countries?.map(country => ({
    label: country.display_name,
    value: country.iso_2
  }));
}
Region Persistence
Region selection is automatically persisted using AsyncStorage:
-
On first load, defaults to the first available region
-
On subsequent loads, restores the previously selected region
-
Region ID is stored under the ‘region_id’ key
👤 Customer Management
The customer functionality is provided through the useCustomer hook, which handles authentication and customer data management.
Basic Usage
import { useCustomer } from '@data/customer-context';

function MyComponent() {
  const {
    customer,           // Current customer data
    login,             // Login with email/password
    logout,            // Logout current customer
    register,          // Register new customer
    refreshCustomer,   // Refresh customer data
    updateCustomer     // Update customer details
  } = useCustomer();
}
Authentication
- Login:
const { login } = useCustomer();

try {
  await login(email, password);
  // On successful login:
  // - JWT token is stored in AsyncStorage
  // - Customer data is fetched
  // - Cart is associated with customer
} catch (error) {
  // Handle login error
}- Register new customer:
const { register } = useCustomer();

try {
  await register(
    email,
    password,
    firstName,
    lastName
  );
  // Registration automatically logs in the customer
} catch (error) {
  // Handle registration error
}- Logout:
const { logout } = useCustomer();

await logout();
// This will:
// - Clear the stored JWT token
// - Reset customer data
// - Reset cart
Managing Customer Data
- Access customer information:
import { useLoggedIn } from '@data/hooks';

function MyComponent() {
  const { customer } = useCustomer();
  const isLoggedIn = useLoggedIn();

  // Access customer details
  const {
    email,
    first_name,
    last_name,
    phone,
    billing_address,
    shipping_addresses
  } = customer || {};
}- Update customer details:
const { updateCustomer } = useCustomer();

// Update customer information
await updateCustomer({
  first_name: "John",
  last_name: "Doe",
  phone: "+1234567890"
});- Refresh customer data:
const { refreshCustomer } = useCustomer();

// Fetch latest customer data from server
await refreshCustomer();
Session Management
The customer session is automatically managed:
-
JWT token is stored in AsyncStorage under ‘auth_token’
-
Session is restored on app launch
-
Token is automatically attached to API requests
-
Session is cleared on logout
🎨 Theme Management
The app includes a flexible theming system with built-in light/dark mode support and multiple color schemes.
Basic Usage
import { useColors, useTheme, useThemeName, useColorScheme } from '@styles/hooks';

function MyComponent() {
  const colors = useColors();          // Get current theme colors
  const themeName = useThemeName();    // Get current theme name
  const { colorScheme } = useColorScheme(); // Get 'light' or 'dark'

  // Access theme colors
  const {
    primary,            // Brand/accent color
    background,         // Main background
    backgroundSecondary,// Secondary/card background
    content,           // Main text color
    contentSecondary   // Secondary text color
  } = colors;
}
Setting Default Theme
// In app.tsx, set your preferred theme name in ThemeProvider
<ThemeProvider name="default">
  {/* ... other providers */}
</ThemeProvider>
Available theme names:
-
“default” (Purple accent)
-
“vintage” (Warm red accent)
-
“funky” (Teal accent)
-
“eco” (Green accent)
Changing Themes
import { useTheme } from '@styles/hooks';

function ThemeSwitcher() {
  const { setThemeName } = useTheme();

  // Switch to a different theme
  const switchTheme = (name: string) => {
    setThemeName(name); // 'default' | 'vintage' | 'funky' | 'eco'
  };
}
System Dark Mode
The theme system automatically responds to system dark mode changes through NativeWind’s useColorScheme hook. Each theme includes both light and dark variants that are automatically applied based on the system setting.
Styling Components
The app uses NativeWind (TailwindCSS) for styling. Theme colors are available as Tailwind classes:
function ThemedButton() {
  return (
    <TouchableOpacity className="bg-primary"> // Theme primary color
      <Text className="text-content font-bold"> // Theme content color
        Click Me
      </Text>
    </TouchableOpacity>
  );
}
🪝 Useful Hooks
The app provides additional hooks for common functionality:
import {
  useProductQuantity,
  useVariantQuantity,
  useCartQuantity,
  useCurrentCheckoutStep,
  useActivePaymentSession,
  useLoggedIn,
  useCountries
} from '@data/hooks';

// Get quantity of a specific product in cart
const quantity = useProductQuantity(productId);

// Get quantity of a specific variant in cart
const variantQuantity = useVariantQuantity(variantId);

// Get total number of items in cart
const cartQuantity = useCartQuantity();

// Get current checkout step
const checkoutStep = useCurrentCheckoutStep();
// Returns: 'address' | 'delivery' | 'payment' | 'review'

// Get active payment session in checkout
const paymentSession = useActivePaymentSession();

// Check if user is logged in
const isLoggedIn = useLoggedIn();

// Get formatted list of countries for current region
const countries = useCountries();
// Returns: Array<{ label: string, value: string }>
Read the detailed documentation in the official repo of Medusa Mobile
Recent Inventory, Cart, and Checkout Improvements
Product details now explicitly request Medusa’s computed +variants.inventory_quantity field so stock checks can account for inventory management, backorders, and available quantity. When customizing product queries, preserve this field selection.
The animated View Cart button now keeps its native press target stable while the outer wrapper animates its reveal. Cart totals also handle optional values, and the floating button uses the current theme color.
Checkout requires a saved shipping method before continuing to payment and blocks continuation while a shipping update is in flight. The review summary prefers the payment provider selected in the current checkout, with a pending or authorized cart session as its fallback. This keeps the summary consistent when payment-session creation has not refreshed the shared cart.
Focused Jest tests cover the shipping guards and payment summary. Before releasing, check stock availability, cart taps and animations, address and shipping selection, and manual-payment order completion on a device or emulator with your backend. Passing unit tests does not establish native build or live backend compatibility. Follow the manual validation checklist.
Maintaining Your Fork
The dependency upgrades include Reanimated 4, Zod 4 with a compatible Hook Form resolver, and ESLint 9 with flat configuration. Keep React and its test renderer aligned with the version expected by React Native. NativeWind 4 currently uses Tailwind 3, and the Babel toolchain remains on version 7. Consult the dependency constraints before upgrading individual packages.
Dependabot groups npm minor and patch updates weekly and opens major updates separately. Commit the manifest and lockfile together, run npm run verify, and build and exercise the affected native integrations for dependency changes. The repository’s AGENTS.md, development guide, and architecture guide document the workflow for contributors and coding agents.
Next Steps
Once your Medusa mobile app is running, here’s what to do next:
Customize Your App
-
Select one theme from the built-in themes, customize one of them, or build a new theme config to match your app requirement.
-
Modify UI as needed. You have access to full source code and the ability to change anything.
-
Add custom features using Medusa’s API
Production Release
Complete device and backend validation, implement any required payment integrations, and follow React Native’s release guides for Android and iOS:
Publishing to Google Play Store
Wrapping up
Start building your mobile commerce experience with React Native and Medusa today! Check out the GitHub repository of Medusa Mobile for the complete source code.