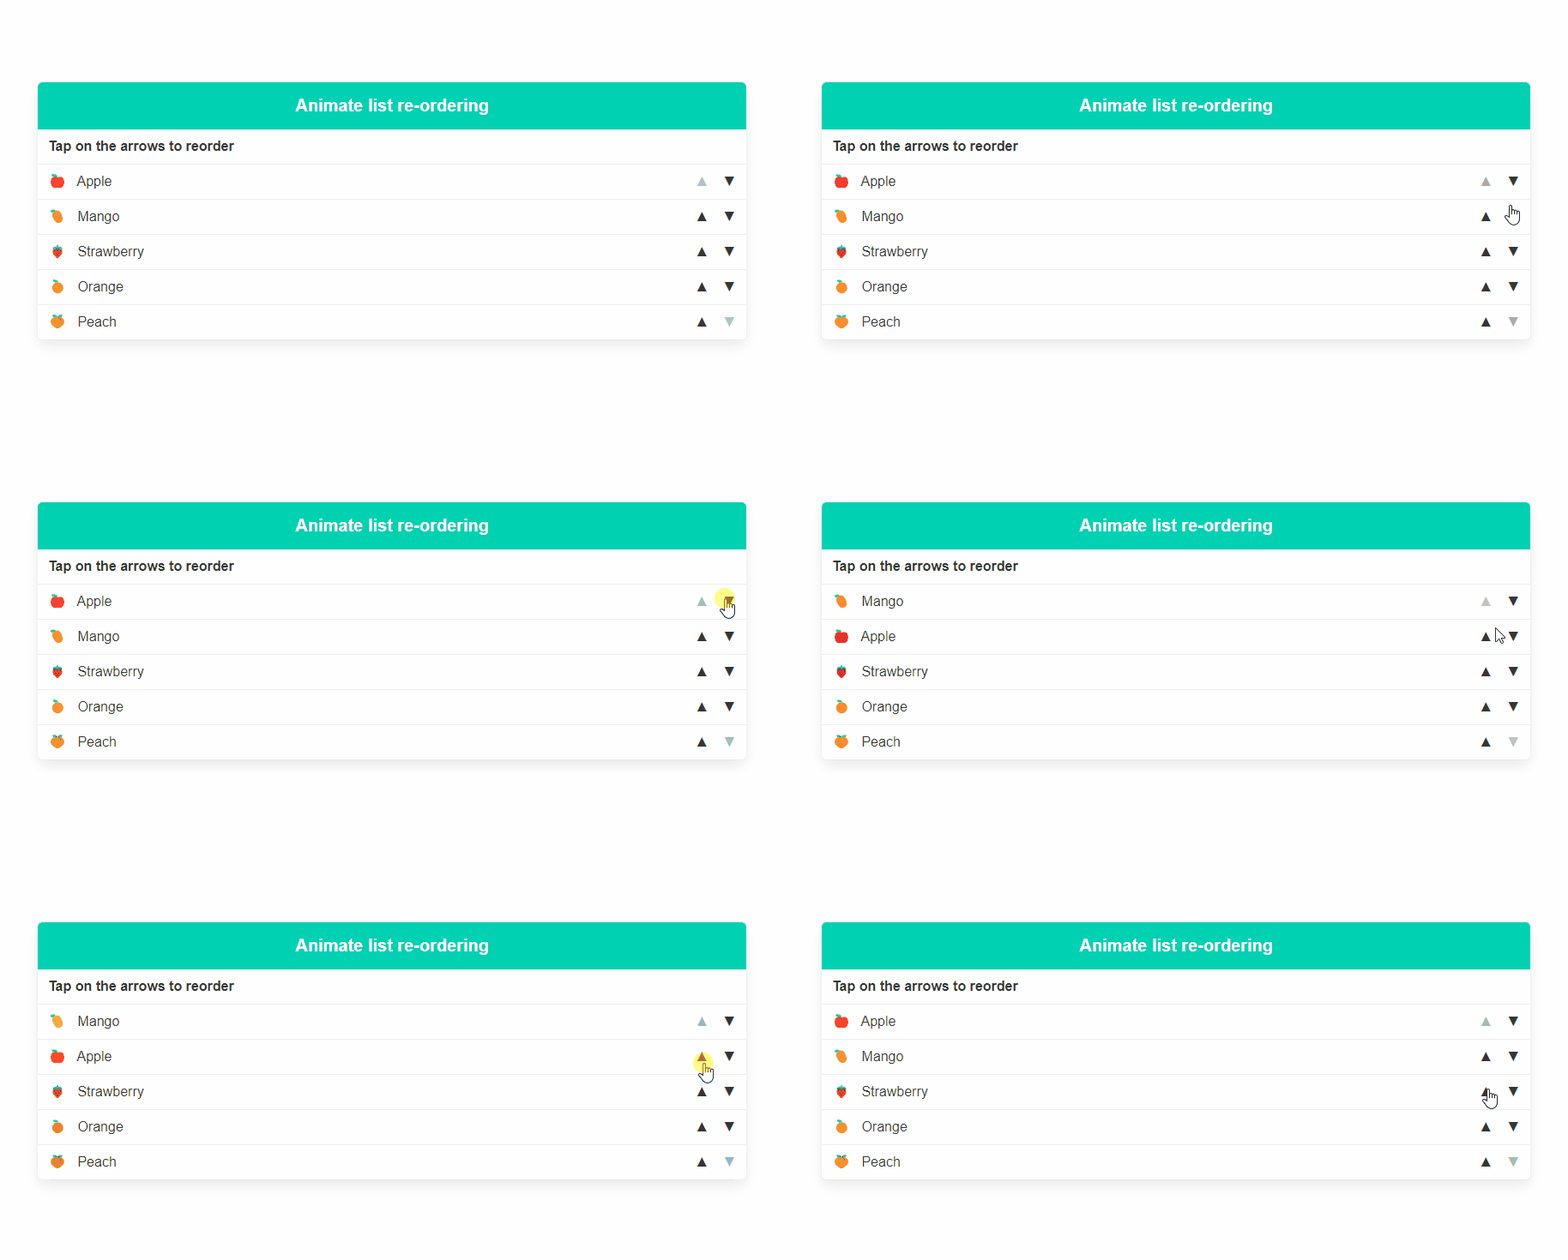
Reordering a list and animating them is a very good user experience. Users will understand that the items’ order has changed clearly if we animate them. Without animation, the user experience would be bad and the user has to figure out what happened suddenly
Let’s see how to animate the list re-ordering easily using React and a library

List re-ordering using auto-animate
AutoAnimate is a zero-config, drop-in animation utility that adds smooth transitions to your web app. You can use it with React, Solid, Vue, Svelte, or any other JavaScript application.
In this blog post, we’ll look at how to use it in ReactJs
Installation
Install using your package manager of choice to add @formkit/auto-animate to your project:
Yarn
yarn add @formkit/auto-animate
NPM
npm install @formkit/auto-animate
Usage
Using auto-animate to re-order a list is very easy. All you need to do is use the useAutoAnimate hook and pass the return value to any list container. Once this is done, any element change i.e adding an element or removing an element or reordering an element will be auto-animated!
Here’s some example code:
import { useAutoAnimate } from '@formkit/auto-animate/react'

function MyList () {
  const [animationParent] = useAutoAnimate()
  return (
    <ul ref={animationParent}>
      {/* 🪄 Magic animations for your list */}
    </ul>
  )
}
Working demo
I’ve created a working demo in code sandbox to show how it works live. Here’s the code and the demo embedded below.
import { useAutoAnimate } from "@formkit/auto-animate/react";
import { useState } from "react";

import "./styles.css";

export default function App() {
  return (
    <div className="App">
      <MyList />
    </div>
  );
}

function MyList() {
  const [animationParent] = useAutoAnimate();
  const [fruits, setFruits] = useState([
    { name: "Apple", emoji: "🍎" },
    { name: "Mango", emoji: "🥭" },
    { name: "Strawberry", emoji: "🍓" },
    { name: "Orange", emoji: "🍊" },
    { name: "Peach", emoji: "🍑" }
  ]);

  const moveUp = (fruit) => {
    // move the fruit up
    const fruitIndex = fruits.findIndex((f) => f.name === fruit.name);
    if (fruitIndex === 0) return;
    const newFruits = [...fruits];
    newFruits[fruitIndex] = fruits[fruitIndex - 1];
    newFruits[fruitIndex - 1] = fruit;
    setFruits(newFruits);
  };

  const moveDown = (fruit) => {
    // move the fruit down
    const fruitIndex = fruits.findIndex((f) => f.name === fruit.name);
    if (fruitIndex === fruits.length - 1) return;
    const newFruits = [...fruits];
    newFruits[fruitIndex] = fruits[fruitIndex + 1];
    newFruits[fruitIndex + 1] = fruit;
    setFruits(newFruits);
  };

  return (
    <article className="panel is-primary">
      <p className="panel-heading">Animate list re-ordering</p>
      <div className="panel-block has-text-weight-semibold">
        Tap on the arrows to reorder
      </div>
      <ul ref={animationParent}>
        {fruits.map((fruit, i) => (
          <li
            key={fruit.name}
            className="panel-block is-active is-flex is-justify-content-space-between"
          >
            <div>
              <span role="img" aria-label="apple" className="mr-2">
                {fruit.emoji}
              </span>{" "}
              {fruit.name}
            </div>
            <div className="is-flex">
              <div
                onClick={() => moveUp(fruit)}
                className={`mr-4 ${
                  i === 0 ? "has-text-grey-light" : "is-clickable"
                }`}
              >
                ▲
              </div>
              <div
                onClick={() => moveDown(fruit)}
                className={`${
                  i === fruits.length - 1
                    ? "has-text-grey-light"
                    : "is-clickable"
                }`}
              >
                ▼
              </div>
            </div>
          </li>
        ))}
      </ul>
    </article>
  );
}
Conclusion
Auto-animate can be used in many other use cases such as accordion, collapsible, animating form error messages, etc. I’ll write about it in a separate blog post but have fun reordering the list easily now!
Also, read How to create a collapsible in React easily
- Ultimate Guide: Build A Mobile E-commerce App With React Native And Medusa.js - February 15, 2025
- Flutter lookup failed in @fields error (solved) - July 14, 2023
- Free open source alternative to Notion along with AI - July 13, 2023
